
Create your first agent
Set up an agent in four short steps, in about three minutes.
Creating an agent takes about three minutes and four short steps. No technical setup.
Step 1: What should it do?
- Click Agents in the menu, then New agent at the top right (or Start a new agent in the middle of the page).
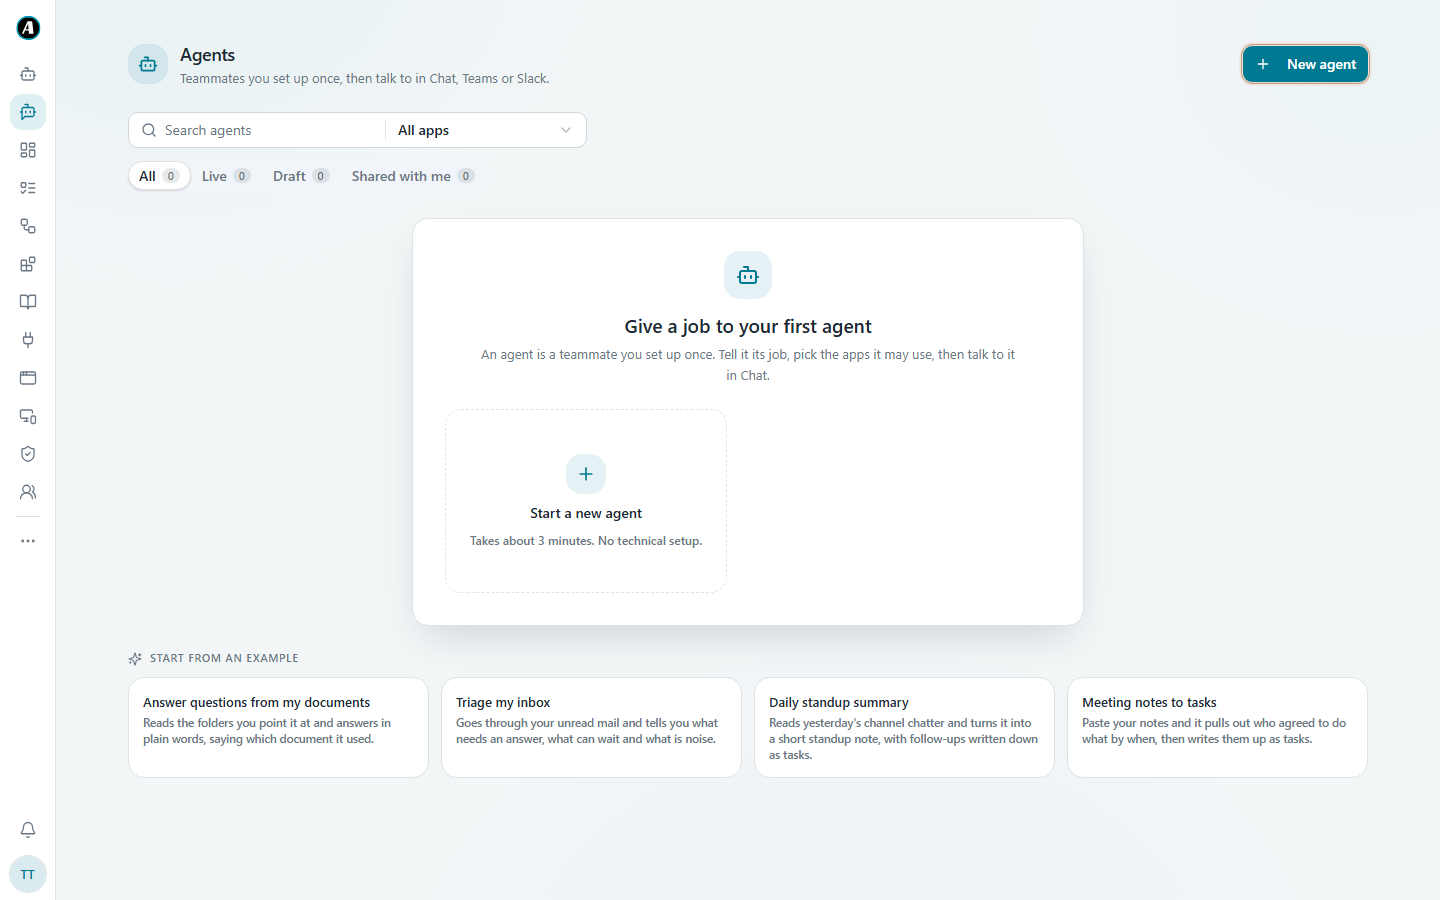
- Give it a Name, like "HR Helper".
- Describe Its job, in your words. For example: "Answers questions about leave, pay and company policies using our HR documents."
- Under How should it do the job?, say how it should answer, what it must never do, and the tone to use. Not sure? Click Let Agento draft it.
- Click Continue.
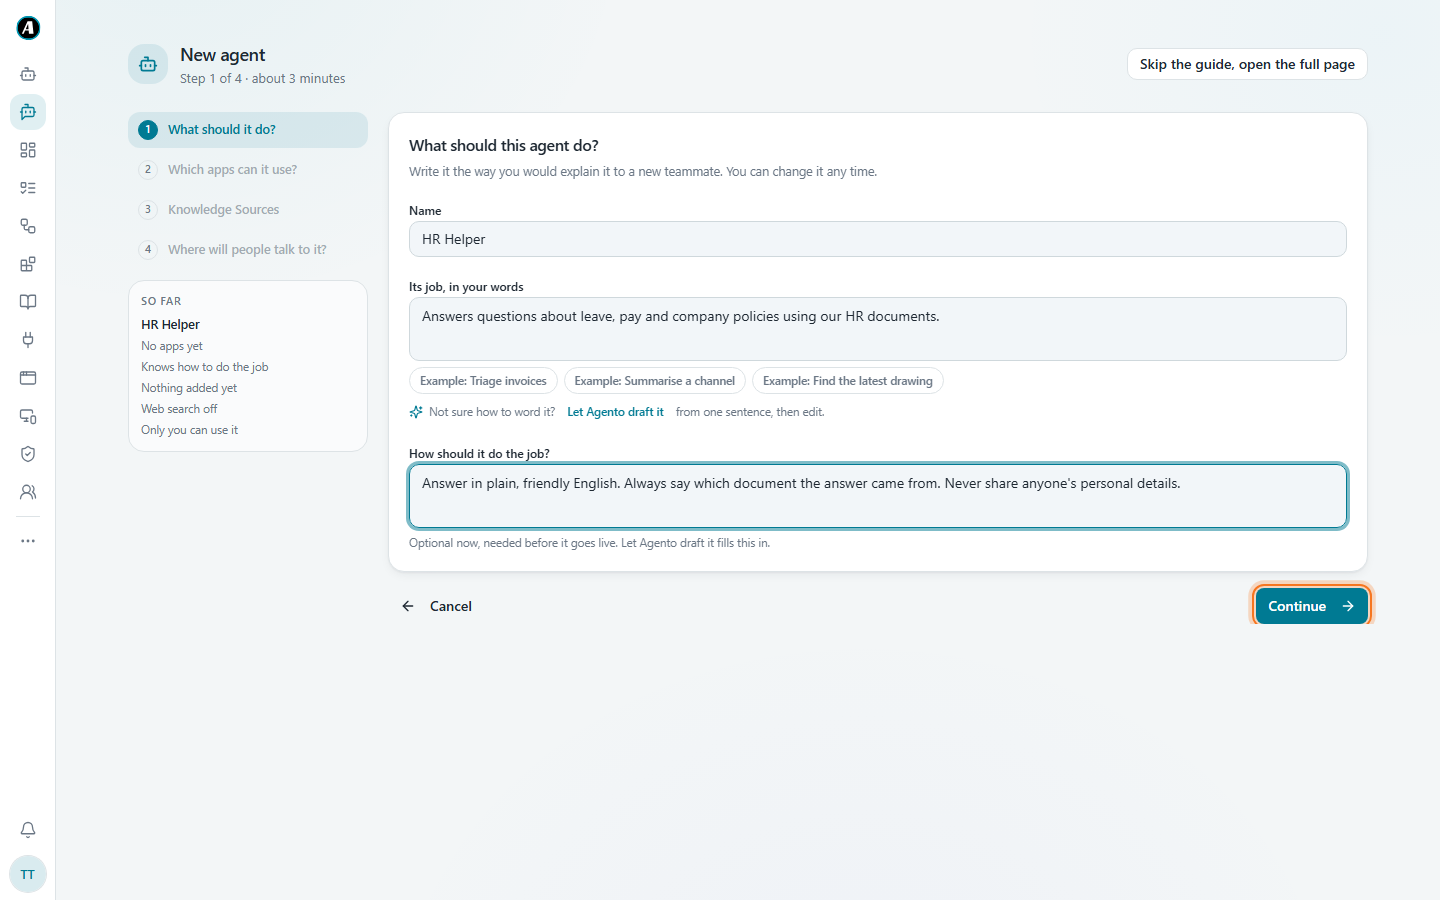
Step 2: Which apps can it use?
Pick the apps the agent may use, like Google Drive or Gmail. Only give it what it needs for its job. Apps you haven't connected yet are listed under Connect first.
Leave Ask me before it sends, posts or creates anything switched on. It's the safe choice. Then click Continue.
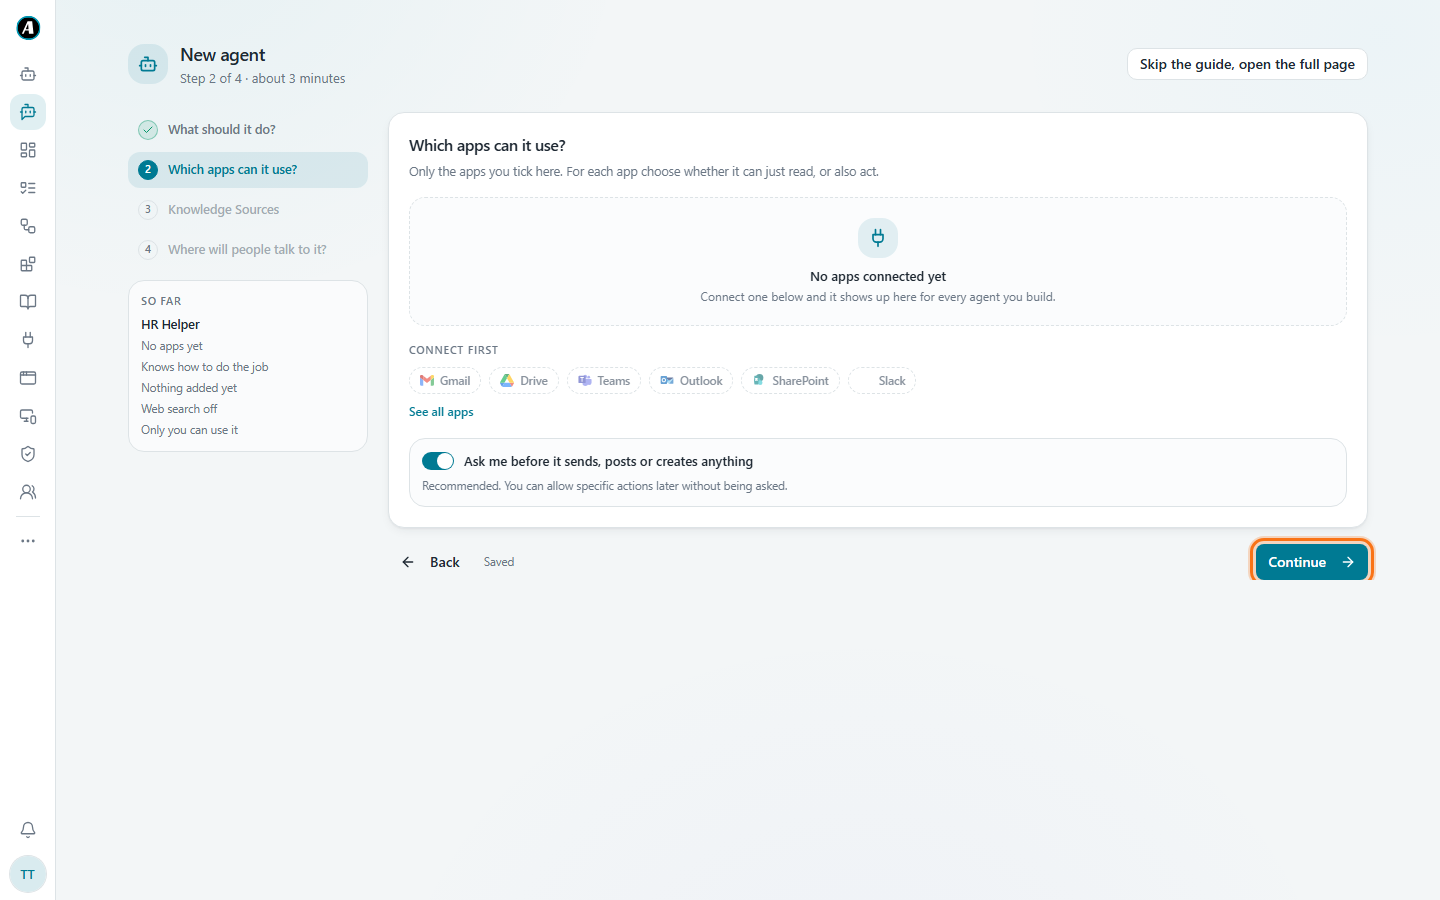
Step 3: Knowledge sources
Add the documents it should know about, like your HR policies. You can:
- drop files into the Add files box (PDF, Word, PowerPoint, text, up to 25 MB each)
- paste a web page link and click Add a web page
- Pick a collection you already keep on the Knowledge page
It will answer from these and say which document it used. Leave Also allow general web search off if it should stick to your documents. Then click Continue.
Step 4: Where will people talk to it?
Pick one or more places:
- Agento Chat: it shows up on the Chat page.
- Inside workflows: workflows can hand it a job, like answering an email.
- Teams: type its name in a Teams channel to ask it.
- Slack: it answers in a Slack channel or a direct message.
- Discord: add it to a server channel.
- Share a link: a simple chat page anyone in your workspace can open.
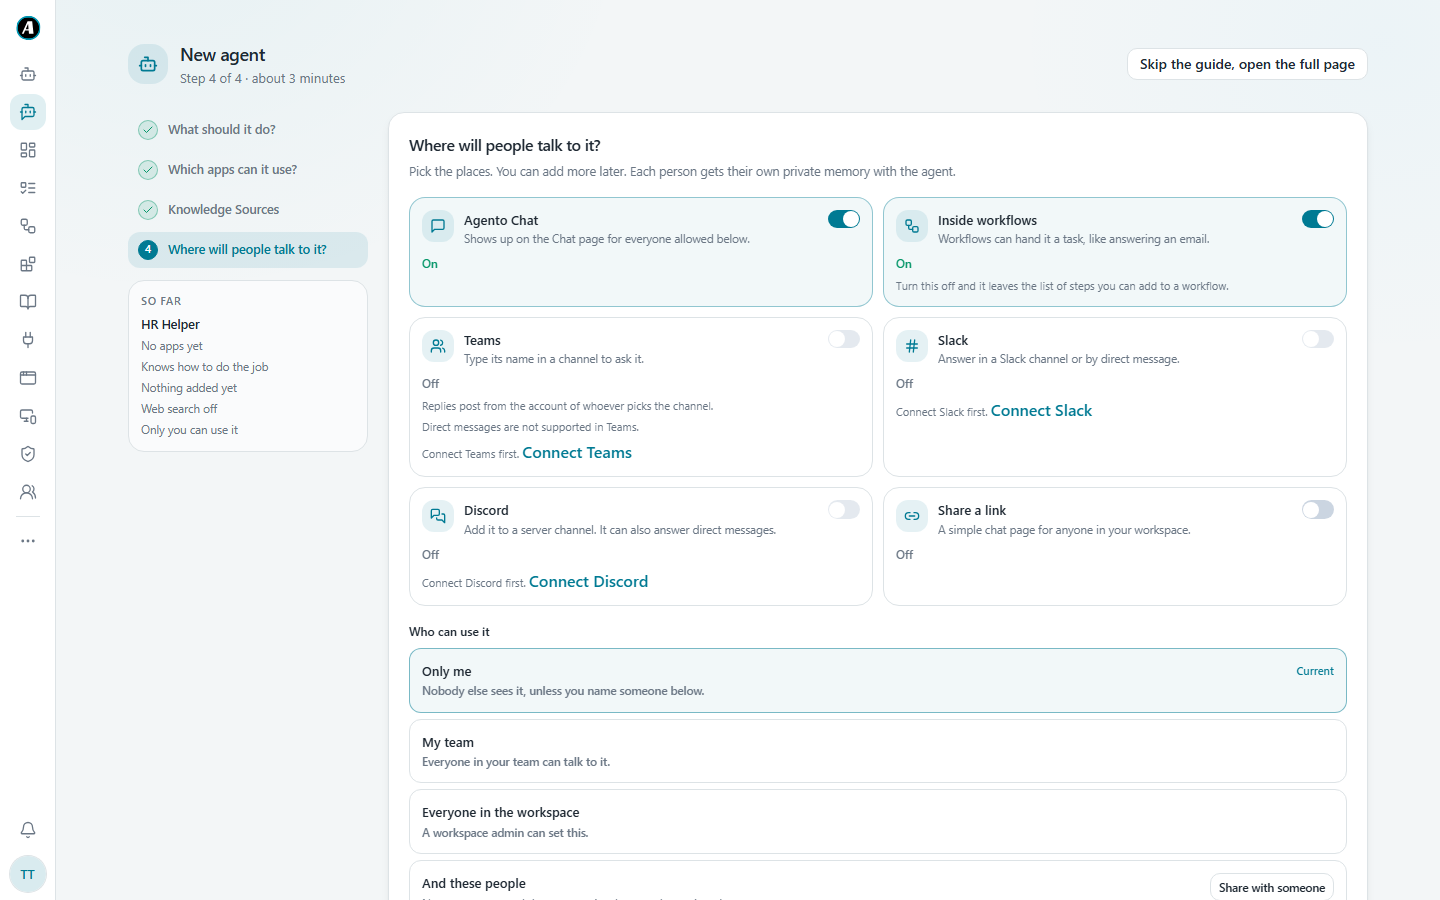
Then choose who can talk to it: Only me, My team, or Everyone in the workspace (an admin can set this one).
When you're happy, click Go live. Your agent is now Live.
Talking to your agent
Open it from the Agents page, or find it in the places you picked in step 4. Ask questions the way you'd ask a colleague.
Example: what to type in each step
Here's a full HR helper, so you can see what good answers look like.
Name: HR Helper
Its job, in your words: "Answers questions about leave, pay and company policies using our HR documents."
How should it do the job? "Answer in plain, friendly English. Always say which document the answer came from. If you don't know, say so and suggest emailing hr@company.com. Never share anyone's personal details."
Apps: none needed.
Knowledge: the files "Leave policy.pdf", "Pay guide.docx" and "Code of conduct.pdf".
Where people talk to it: Agento Chat and Teams. Who can use it: Everyone in the workspace.
Good to know
- The box on the left called So far shows a summary of everything you've set up. Check it before you finish.
- Prefer one big page instead of four steps? Click Skip the guide, open the full page.
- You can change anything later. Open the agent and edit it.